Model: Microsoft Surface Laptop Studio | Level: Beginner
When people hear “Microsoft Surface Repair,” they usually imagine shattered glass, deeply buried motherboards, and a lot of frustration. Microsoft’s industrial design is notoriously difficult to penetrate.
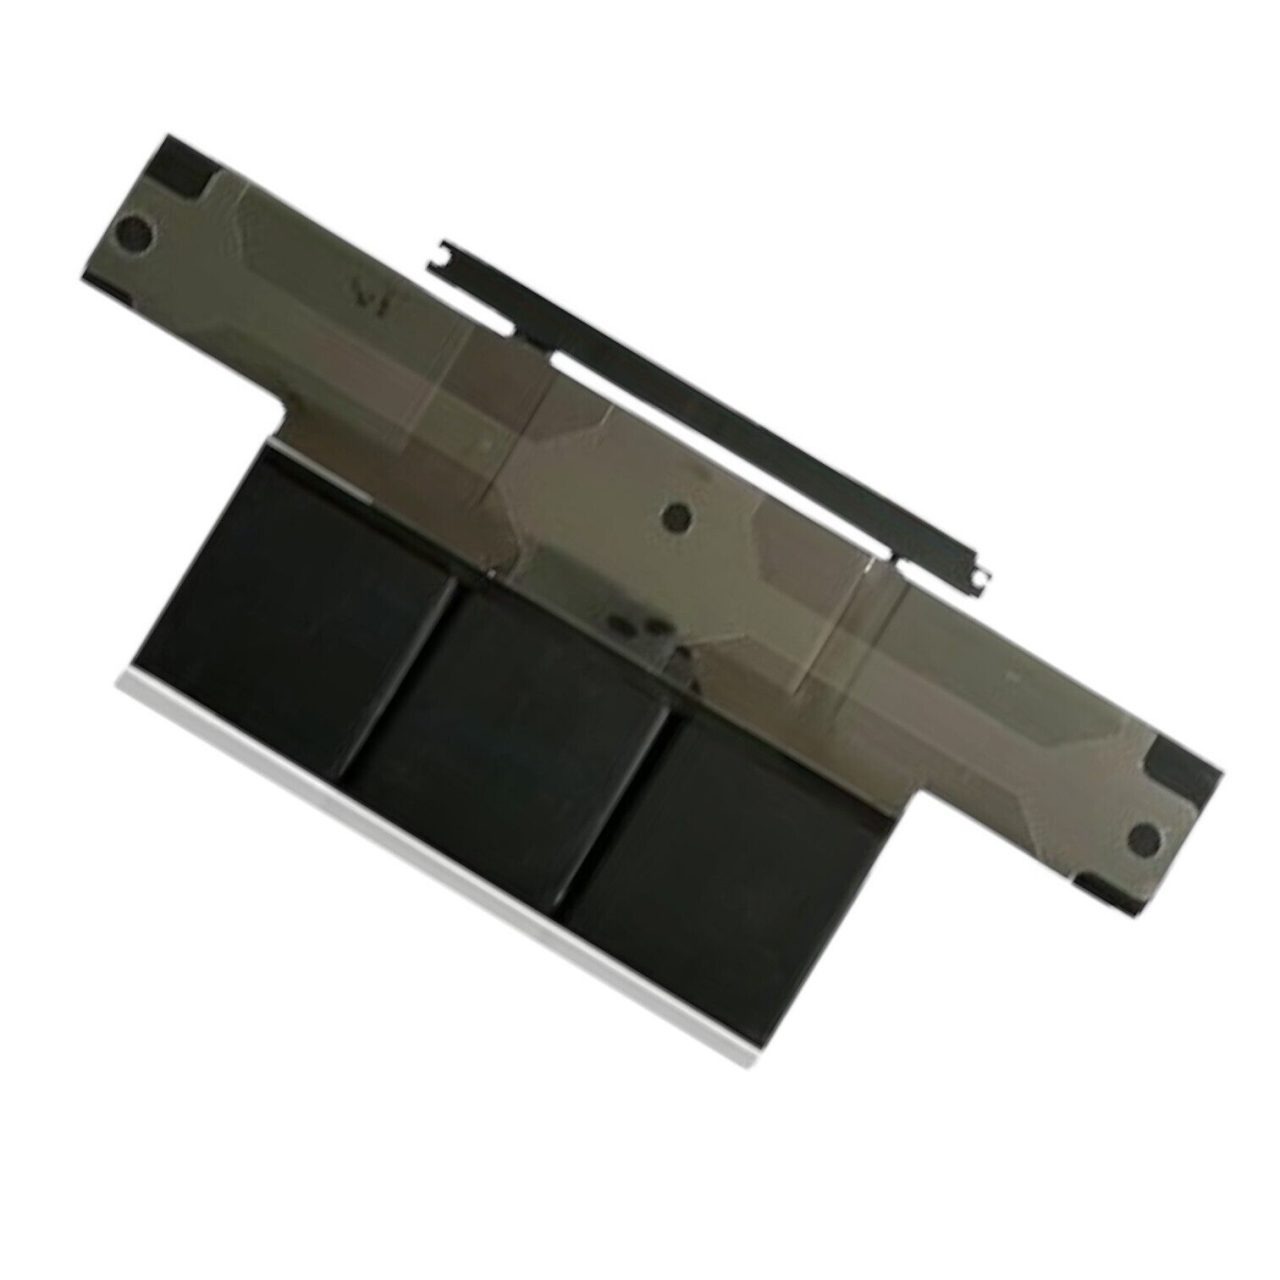
However, the Microsoft Surface Laptop Studio hides a brilliant secret: the battery is mounted directly to the removable backplate. You do not need to remove the keyboard, extract the logic board, or lift the delicate display to access the power source.
If your Surface Laptop Studio is losing its charge quickly, randomly shutting down, or showing a “Service Battery” warning, you are in luck. Our lead technician Nicholas walks you through the entire replacement process in this beginner-friendly, step-by-step guide. Let’s get started.
Don’t let the sleek design intimidate you. The Surface Laptop Studio battery swap is highly accessible for beginners. Follow along with our video tutorial above.
🛠️ Required Tools & Preparation
Before we begin, ensure your Surface Laptop Studio is powered off and unplugged. You will need a few basic precision tools for this job.
Plastic Pry Tool: To safely lift the rubber feet and separate the chassis.
Precision Tweezers: Absolutely essential for handling the delicate cosmetic ring and the battery adhesive pull-tabs.
T3 Torx Screwdriver: The only screwdriver bit required for this entire repair.
Microsoft completely hid all the fasteners on the bottom of this laptop to maintain a seamless, premium look. We have to peel back the cosmetic layers to access them.
Step 1: Removing the Rubber Feet
Grab your plastic pry tool and gently slide it under the edge of the two long rubber feet running horizontally across the base. Pull them up and away from the adhesive. Set them aside safely so the adhesive remains sticky for reassembly.
The rubber feet hide several T3 Torx screws beneath them.
Step 2: Peeling the Cosmetic Ring
Along the outer edge of the laptop base, there is a thin plastic cosmetic ring. Take your precision tweezers, get underneath the edge of this ring, and slowly lift it up.
TekDep Expert Warning: As it goes around the corners, be incredibly careful not to pull too hard. This plastic ring is fragile and will rip. If it breaks, your computer will still function perfectly, but the bottom will look cosmetically damaged. Go slow!
Take extreme care around the corners. The plastic ring snaps easily if pulled with too much force.
Phase 2: Removing the Backplate & Safe Disconnect
With the screws exposed, we can detach the base. However, because of the unique battery placement, you cannot simply rip the backplate off.
Step 1: Removing the T3 Screws
Using your T3 Torx driver, remove the screws located around the perimeter and underneath the feet. Crucial Note: There is a small black bar near the bottom containing three screws. You do not have to remove these three screws. Leave them alone and remove the rest, including the two isolated screws on the far right and left sides.
Remove all T3 screws around the edge, but leave the three screws on the small black bar intact.
Step 2: The “Tilt” Method
Once the screws are out, gently grab the edge of the backplate. DO NOT PULL IT OFF. Lift it and tilt it up slightly like opening a book. The battery is physically attached to the metal backplate you are holding, and it is tethered to the motherboard by a short flex cable.
Step 3: Disconnecting the Battery Power
Look inside the tilted gap to locate the battery connector on the motherboard. It features a simple pull-tab. Grasp the tab and pull it directly back (horizontally) to pop it off the logic board. Once disconnected, you can safely move the entire backplate and battery assembly to your workbench.
The battery lives on the backplate. If you rip the backplate off without disconnecting the cable first, you will destroy the motherboard connector.
Phase 3: Extracting the Old Battery (The Tweezers Method)
With the backplate isolated on your desk, we can remove the degraded battery cells.
Step 1: Locating the Pull-Tabs
Microsoft uses stretch-release adhesive to hold the battery to the metal plate. There are multiple black pull-tabs sticking out from the edges of the battery cells (four on the bottom, two on the middle cell, and four on the very top).
Step 2: The Tweezer Roll
Grasp the tip of one of the pull-tabs with your tweezers. Instead of just pulling backward (which will snap the tab), use the “roll” method. Twist the tweezers in your fingers, rolling the adhesive around the tips like spaghetti on a fork. Pull a little bit, twist a little bit. Repeat this for all the adhesive strips.
Once all the adhesive is removed, the old battery will simply lift off the backplate.
Twisting the tweezers slowly ensures the adhesive stretches and releases properly without snapping underneath the battery.
It is time to install the fresh power source and seal the computer back up.
Step 1: Setting the New Battery
Your new replacement battery should come with pre-installed double-sided adhesive. If it doesn’t, apply strips of high-quality electronics tape to the backplate. Peel the protective film off the adhesive. Look closely at the backplate: there are alignment markers indicating exactly where the battery should sit. Line up the bottom edge first to ensure it fits snugly, then press the battery down firmly.
Proper alignment is crucial. If the battery is seated too high or too low, the flex cable will not reach the motherboard connector.
Step 2: The Tricky Reconnection
Bring the backplate to the laptop chassis and rest it nearby. The battery connector is the trickiest part of the reassembly. It doesn’t just push straight down.
Look at the connector: it has a small lip on the bottom and is angled at the top.
Insert the bottom lip into the motherboard socket first.
Once the bottom is hooked in, push down firmly on the top of the connector to snap it into place.
You must hook the bottom edge of the connector first before pressing down, or it will not seat properly.
Step 3: Sealing the Chassis
Lay the backplate down flush against the chassis.
Use your T3 screwdriver to reinstall all the perimeter screws.
The Cosmetic Ring: Take your thin plastic ring and start from the bottom. Line up the corners precisely and press firmly down. There should be no visible seams.
The Rubber Feet: The rubber feet have a small plastic outcropping on them. Line that outcropping up with the corresponding socket hole in the chassis and press the feet firmly back into place.
Take your time realigning the cosmetic ring and the feet to ensure your Surface looks untouched and factory-new.
Step 4: Power Test
Because you installed a brand-new battery, plug your Surface Laptop Studio into its charger before attempting to turn it on to wake it from its shipping state. Press the power button, verify that the device boots into Windows, and check that the charging indicator is active in the taskbar.
Congratulations! You have successfully performed a battery replacement on the Microsoft Surface Laptop Studio.
🛑 Not Comfortable Handling Battery Adhesive? If reading about hidden screws and delicate pull-tabs has you second-guessing your DIY skills, don’t worry. The TEKDEP experts are here to help.
Is it hard to replace the battery in the Surface Laptop Studio?
Surprisingly, no. While the Surface line is generally difficult to repair, the Surface Laptop Studio battery is actually mounted directly to the removable backplate rather than being buried under the motherboard. This makes it one of the easiest repairs you can perform on this specific device.
Where are the screws on the bottom of the Surface Laptop Studio?
Microsoft completely hid the external fasteners on this device for aesthetic purposes. The T3 Torx screws are located underneath the two long rubber feet and beneath the delicate plastic cosmetic ring that runs around the perimeter of the base.
What happens if I rip the stretch-release battery tabs?
If a pull-tab snaps, do not pry the battery with a metal tool, as this can puncture the lithium-ion cell and cause a fire. Instead, use a few drops of 99% isopropyl alcohol to dissolve the remaining adhesive, then gently lift the battery out with a wide plastic pry tool.
🛑 IMPORTANT: SAFETY & LIABILITY DISCLAIMER TEKDEP®️TEKDEP.com assumes no liability for property damage or injury incurred as a result of any information in this blog post or associated videos. Dealing with internal computer components, specifically Lithium-Ion batteries, carries inherent risks including fire, toxic gas exposure, and irreversible device failure. Any injury, damage, or loss from improper use of tools, mishandling of components, or misinterpretation of this information is the sole responsibility of the user. Perform repairs at your own risk. If you are unsure of your capabilities, please utilize our professional Mail-In Repair Service.
The 14-inch MacBook Pro M4 (A3112) brings powerful Apple Intelligence, but introduces a cryptographic minefield for DIY repair. Learn how to extract the logic board and bypass parts pairing restrictions.
The MacBook Pro A1706 introduced the Touch Bar and a host of internal complexities. Our expert teardown guide breaks down the glued battery challenge, logic board extraction, and the infamous Flexgate issue.
Is your iPhone 15 Plus battery draining fast or swelling? Our expert 2,000-word teardown guide covers the complete A2847 rear-glass entry, capacitor discharge rules, and advanced BMS serialization transfer.
Ent
May 15, 2026
Official TEKDEP Tutorials
Subscribe for expert tutorials, pro tech tips, and teardowns.